Pages

Showing posts with label Mermaid Lagoon Stamp Set. Show all posts

Monday, July 23, 2018

Shello - Guest Design Brutus Monroe

Hi Everybody,

I'm guest designing during the month of July for Brutus Monroe.  I had a blast making the card I'm showing you today called a Shadow Box Card. Jennifer McGuire made a video showing how to make this card and HERE IS A LINK to that video. I followed her video exactly in regards to how to put the cards together so please refer to video for instructions. 

It was a lot of fun decorating this card because you get to decorate the front and then the inside shadow box part. 


Sparkly background and fish :)


I made a background using three colors of Nuvo Shimmer Powders and used the Wave Die Set to cut it out. There are two dies in this set, I love it! I think this is just a gorgeous combination of this die and the shimmery colors used.  I stamped several fish from the Mermaid Lagoon stamp set and colored them with Zig Markers. I decided to use teal color cardstock on the front so I just cut a strip and embossed a stamp from the Mermaid Lagoon stamp set with Alabaster Embossing Powder.  I used the Embossing Ink as well because it is super juicy. I can see what I stamp really well because it's so juicy and shiny and if that makes sense. I'm a huge fan of Brutus Monroe Embossing Ink and Powders. I added a few of the 2-tone flat back pearls as embellishments to look like bubbles. 


On the inside I used the Mermaid Lagoon Underwater Background Stamp and colored it with Zig Markers.  I really like this background stamp because of the size, it is 4"x6" so as you can see, it was perfect for this card.  It is only 4" wide rather than 6" like most are so you can use it much easier on your cards. I also used the 2-tone flat back pearls as bubbles. I used a teal cardstock strip again on the inside to tie everything together and also the fish, shells and starfish from the Mermaid Lagoon Stamp Set. I just love this sentiment, "On a scale of 1 to 10 YOU are an 11."  

So just watch the video, link above, and decorate it however you want.  I used a pretty large die on mine to make the window because I wanted to use the background stamp and wanted to show as much as possible. You can use a smaller die and have room to stamp below the window and add embellishments

I hope you'll try to make a shadow box card and decorating it with mermaids and underwater scenes are so much fun.  Check out all of the stamp sets, stencil, die and embellishments for underwater/mermaid scenes HERE with this link.

Thank you so much for stopping by and have a great day!


Regina

Monday, July 16, 2018

Splashing To Say Hello - Brutus Monroe Guest Design

Hi Everybody,

I am very excited to be guest designing for Brutus Monroe this month.  I was on the design team the last quarter of last year and loved the excitement and passion that I saw from Christopher Alan, the owner of the company.  It was exciting for me to see the company growing while on the design team.  I fell in love with the products, especially the embossing powders and ink.... which leads me to how the card I am showing today came to fruition if you will. 

I am a messy crafter and currently I am not working in my craft room, which is upstairs due to a recent knee replacement and another in the near future (lucky me lol), so I have a table and on this table, my actual work area is probably 10" after I push everything aside.  

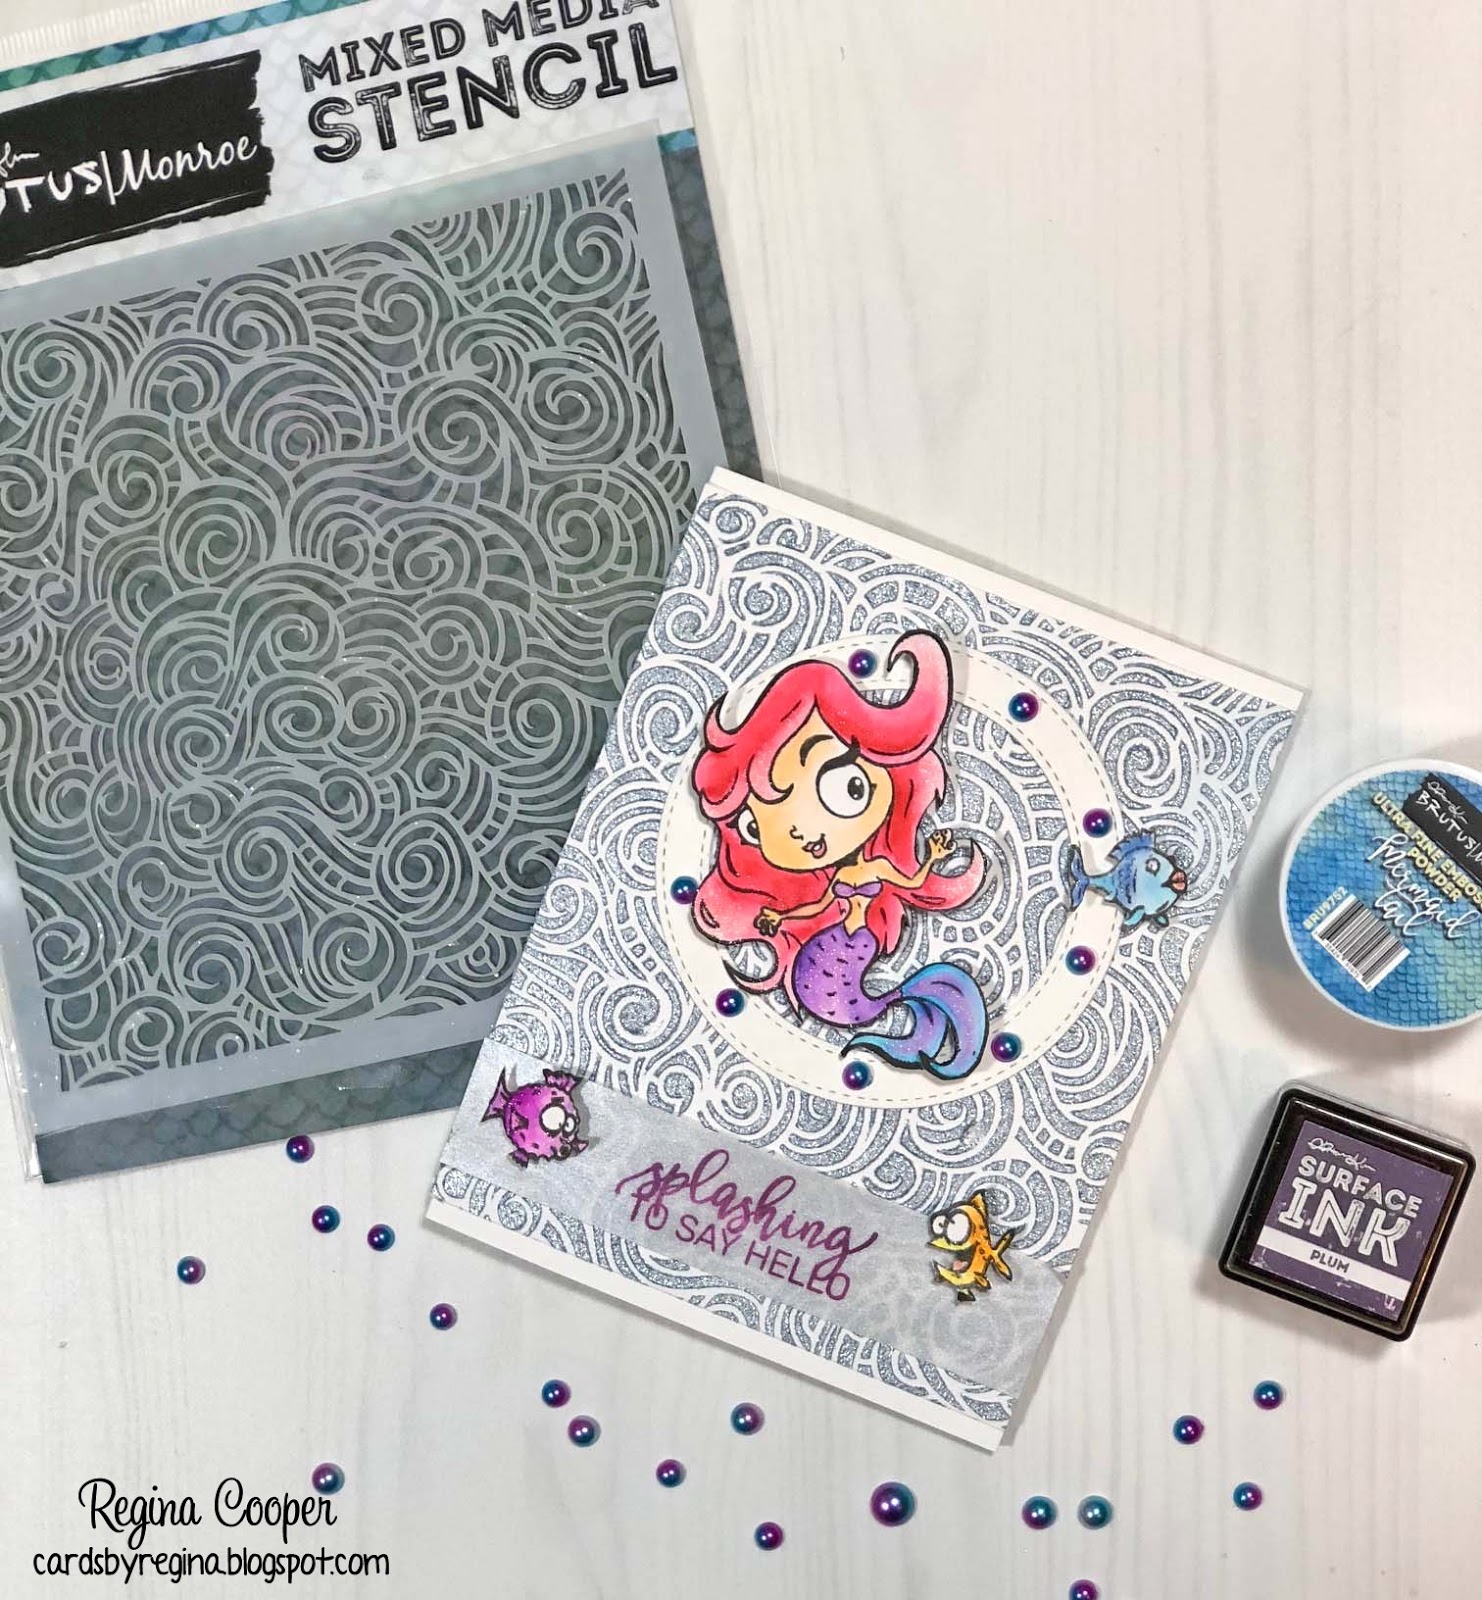
I was working on a project using Pearlescent Embossing Paste, I had some out of the jar on my kraft mat.  Well, it seems that I can't start one project and actually finish it, clean up, and move on to the next one, so I started playing around with some of the new products I got from Brutus Monroe.  I embossed on the cool new Tangled Waves Stencil and used the new Mermaid Tail Embossing Powder.  The result was beautiful!  It looked kind of like a metallic blue.  


Well, some of the embossing powder got in the embossing paste and at first I freaked out thinking I wasted those two products but I thought, what do I have to lose, and started mixing them together.  I was surprised to find out that the color was really light, not the darker blue like the powder. I spread it over the Tangled Waves Stencil and I was mesmerized by how beautiful this color turned out to be.  It is a pearly looking light blue/gray color.  It's gorgeous and I think perfect to use as water and with the Mermaid Lagoon stamp set that I used.  I created a masterpiece!!!  :)


I was curious what it would look like on black cardstock and it's a beautiful result as well!  I'll use this for another project!


Okay, I had to foil the stencil while it was out lol.  How beautiful is this?? This is the Deco Foil in Lapis Watercolor.  


So now I have this beautiful pearly background... I wanted to make something cute with the Mermaid Lagoon Stamp Set but careful not to cover too much of the background. 


(I apologize if the stamps are blurry, I used all of them so they have some residual black ink on them)


I stamped all of the stamps in the set on bristol smooth paper and used Zig Real Brush Markers as my coloring medium. I decided to use the cute mermaid and some fish from the stamp set.  I added Clear Wink of Stella to the mermaid to add a subtle shine.

I didn't just want to adhere her directly to the background so I used a die that cut a circle but cut the inside out so that the background can be seen through it.  I popped her up on the die with some foam squares and added some of the beautiful Blue and Purple Flat Back Pearls around the die.  Aren't they gorgeous??  I do have to make mention that you need a strong glue for your cardstock to stay adhered to this paste on the background so I used Brutus Monroe Glue.  This is such a strong glue that I highly recommend you try it.  I have even used it to glue a cracked ceramic tile coaster back together and it worked like a charm.  I trust this glue for anything, crafty or around the house. 

I positioned the mermaid kind of sideways like she's swimming and to look like she's waving because I'm using the sentiment from the set, "splashing to say hello".  I stamped the sentiment on a pearl color vellum using the Brutus Monroe Plum Surface Ink.  It inks up fabulously on vellum but use your heat tool to dry the ink or it will smear.  Do it carefully from the back so you don't warp the vellum. 

To finish it off, I popped up a few fish that I also colored with Zig Markers on the card.  

I think the Mermaid Tail Embossing Powder is such a fun color and now I've shown you a different way to use it. 

I had a lot of fun using the Tangled Waves Stencil, Mermaid Tail Embossing Powder and Mermaid Lagoon Stamp Set.  This is just one project that I've created... stay tuned for more to come in the month of July. 

I hope I've inspired you to play with your supplies. Get that palette knife out and mix the Mermaid Tail Embossing Powder with White or Translucent Embossing Pastes to see what they look like. Try it on different color cardstock as well. Have FUN!

Here is a link to the Brutus Monroe Blog for even more inspiration! https://www.brutusmonroe.com/blogs/news/guest-designer-regina-cooper

Thanks for stopping by and have a great day!


Regina

P.S. I also tried Nuvo Shimmer Powders with this stencil lol.  I love making backgrounds, what can I say?  :)


https://cardsbyregina.blogspot.com